
Want to stamp your photos with a personal mark? A watermark is your digital signature - a logo, text, or image that proves the work is yours and keeps it safe from unauthorized use.
AliveColors makes it simple to design a custom watermark and apply it to any picture. Here’s how to do it step by step.


In the AliveColors graphic editor, create a new square image. To do this, select File → New, and in the settings block of the opened tab, set the width and height of the new document to 500 pixels each, leaving the background white.
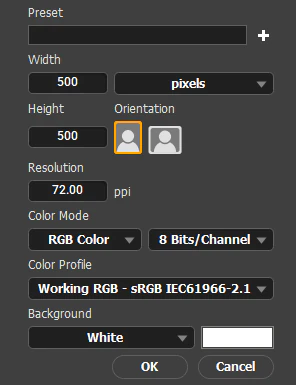 New Document Settings
We’ll create a simple tile that, when repeated, shows the word in a checkerboard pattern. To make that pattern work, the tile needs two copies of the word: one placed in the upper-left corner and one in the lower-right corner, offset from each other. To position them precisely, we’ll add two horizontal guides.
To do this, open the Guidelines... panel from the Workspace menu. In the Y field, enter the value 125 and click Add, then enter 375 and click Add again. Click OK to finalize the creation of the guides.
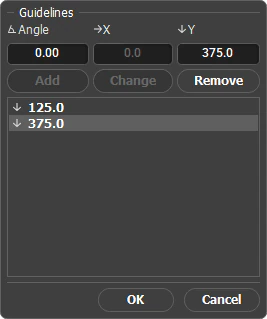 Adding Guides
On the toolbar, select the Text tool  and add an inscription.
Note. To align the inscription relative to the canvas, you can use the alignment buttons in the Move tool  .
.
Snap the text to the left edge and align it to the middle of the upper guide.
Then create a copy of the text layer, snap it to the right edge, and align it to the middle of the lower guide.
The base of the watermark is ready.
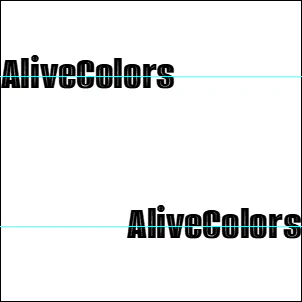 New Texture
Use Edit → New Texture... to add the created image to the Texture Library.
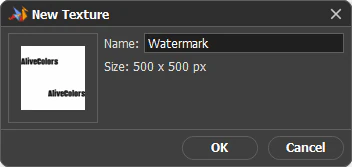 Saving the Texture
Switch to the image that should receive the watermark.
Open the Fill... option from the Edit menu, set Fill Type = Pattern, select the created texture in the Texture Library, and adjust the parameters.
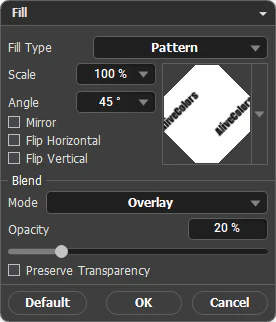 Fill Parameters
To apply the watermark to multiple photos at once, save these fill settings as an action and run them through Batch Processing.
Image with Watermark
That's all there is to it! You’ve just created a custom watermark. Feel free to experiment with different shapes, sizes, and spacing to find a look that fits your photos - and adjust the opacity to keep the mark subtle but still visible.