AliveColors provides a wide range of photo stylization features. This tutorial shows how to tint summer photos taken on a bright and sunny day.


(mouse over to see the original image)
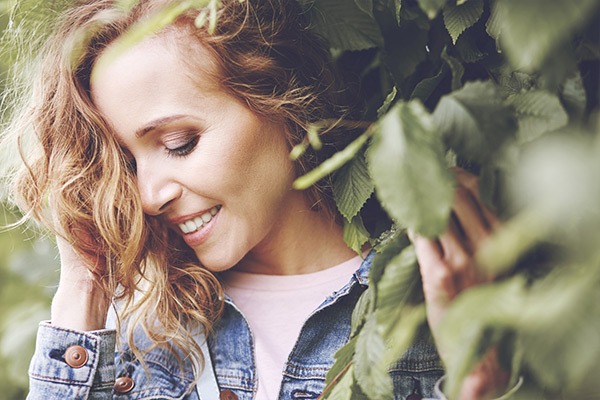
Open the original photo in the AliveColors image editor.
Add blues to the shadows. To do this, create a new Levels adjustment layer above the background layer by clicking the button  located in the Layers panel and selecting Adjustment Layer → Levels.
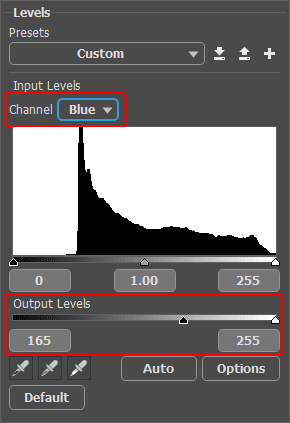
Change the adjustment layer settings. Select Blue in the channel list and increase the black point value in the Output Levels until the shadows appear bright blue.
 Levels Adjustment Layer
 Blue Toning
Now let's add some yellow.
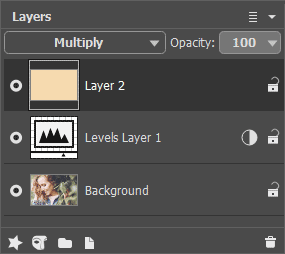
Create a new raster layer and fill it with the color #f4dcad using the Paint Bucket tool  . Change the blend mode of the layer to Multiply.
 Layers Panel
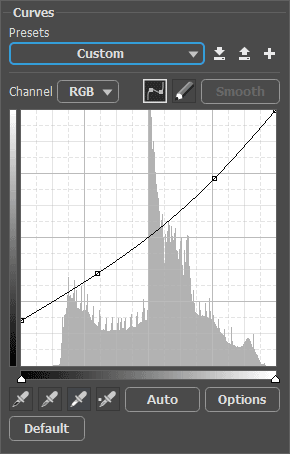
Reduce the contrast of the resulting image using the Curves adjustment layer (Layers → New → Adjustment
 Curves Adjustment Layer
Here's the finished result:
 Result
